under Windows
This page contains automatically translated content.
Content
Office 365 setup
If you are using Office-365 (for Office 2019 users), set the following registry value (instructions at the following link) at [ HKEY_CURRENT_USER\SOFTWARE\Microsoft\Office\16.0\Outlook\AutoDiscover]: DWORD value (32-bit): ExcludeExplicitO365Endpoint value 1. Only then proceed with the instructions. Alternate Powershell command: Set-ItemProperty -Path "HKCU:\Software\Microsoft\Office\16.0\Outlook\AutoDiscover" -Name "ExcludeExplicitO365Endpoint" -Value 1 -Type DWORD
Open Outlook with a double click. A window opens where you enter your e-mail address.
Open Outlook by double-clicking on it. Enter your e-mail address, e.g. < [email protected] >, in the window that appears.

The mailbox can be integrated automatically or manually. If you integrate it manually, select "Exchange".
This step should not occur with automatic integration.

Then select "Other account". In the "User name" field, enter < its-ad\ > followed by your UniAccount. Then enter your password. This step may need to be repeated.

Finally, the message that the account setup is complete will appear and Outlook will open with your account.

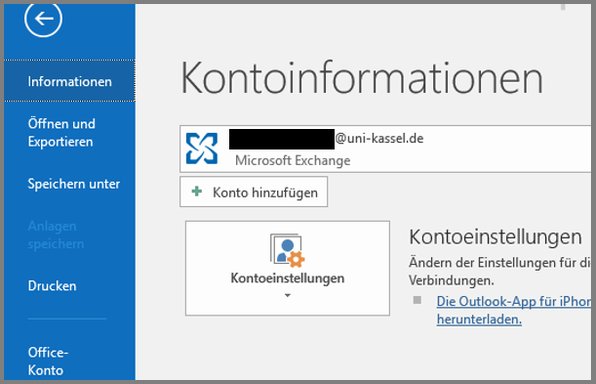
Next, the account settings must be adjusted. To do this, go to "File", select "Account settings" and click on "Account settings" again in the drop-down menu.
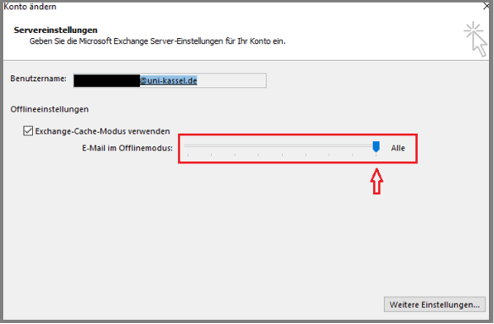
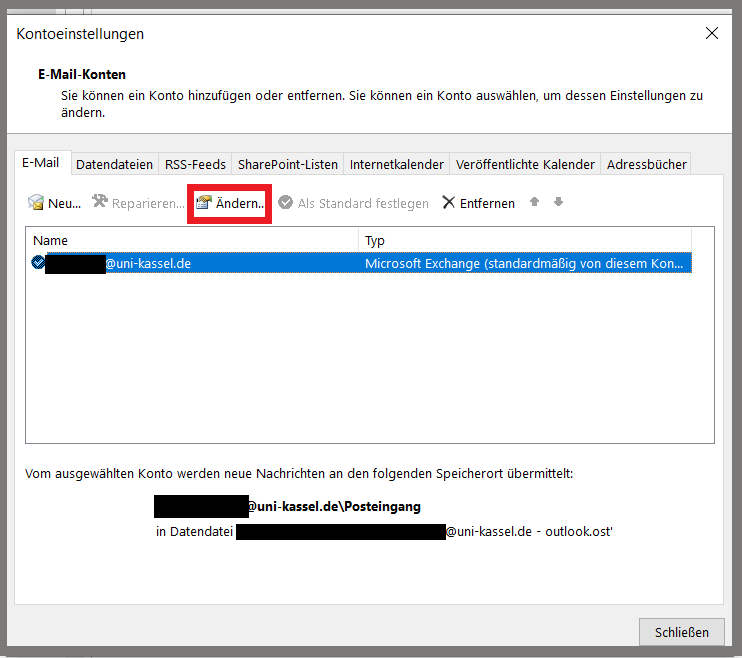
Select your account and click on "Change...". Then drag the "Email in offline mode" slider all the way to the right towards "All". Finally, click on "More settings...".

Remove the checkmark next to "Download shared folders". Finally, confirm all open windows and restart Outlook.

Initial setup Outlook 2016
Open Outlook by double-clicking on it. A window will open. Here you click on "Next".
Open Outlook by double-clicking on it. A window will appear in which you click on "Next".

The following window then appears. Click on "Next" here as well.

Enter your e-mail address in the next window under "E-mail address", e.g. < [email protected] >. The remaining fields can be left blank. Then click on "Next".

The following message then appears. Check the box "Do not ask about this website in the future" and then click on "Allow".

In the following window, please click on "More options" and then on "Use another account". Now enter <its-ad\ > followed by your UniAccount in the "Username" field. Then enter your password. This step may need to be repeated.

The following window will then appear. Check the box "Change account settings" and click on "Next".

Drag the "Email in offline mode" slider all the way to the right towards "All". Then click on "Further settings...".
Click on the "Advanced" tab. Remove the checkmark next to "Download shared folders". Finally, confirm all open windows and restart Outlook.

Initial setup Outlook 2019
Note on the use of Outlook 2019
When using Outlook 2019, you are required to log in with a Microsoft account. You can set up a Microsoft account via the Microsoft Campus license. You can then log in with the email address set as preferred in IDM and the password for the Microsoft account (not the UniAccount password!).
Using Office 2019 by logging in with a Microsoft account is only possible on one end device. If you want to use Office on multiple devices, please use the Office 365 Campus license.
Double-click to open Outlook. A window will open. Enter your e-mail address here and then click on "Next".

The following message then appears. Check the box "Do not ask about this website in the future" and then click on "Allow".

In the subsequent password prompt, click on "More options" and then on "Use another account". Enter <ITS\> followed by your UniAccount in the "Username" field. This step may need to be repeated.

A message then appears stating that the mailbox has been successfully integrated. Confirm this with "OK".
Then open Outlook and navigate to "Account settings" via "File" at the top left.

Select the "Change" option for the integrated mailbox.
Drag the "Email in offline mode" slider all the way to the right towards "All". Then click on "Further settings...".

Click on the "Advanced" tab. Remove the checkmark next to "Download shared folders". Finally, confirm all open windows and restart Outlook.

Adding more accounts
If you want to add another primary or secondary account, you need to go through "File" and then click "Add Account".
If you want to set up a group mailbox, please see the following link: Group mailboxes
If you want to add another primary or secondary account, you must go to "File" and then select "Add account".

Enter your name, e-mail address and password and click "Next".
When prompted, enter your password again and then select "OK" and "Finish" to add your e-mail account.
If you would like to set up a group mailbox, please see Group mailboxes.
